How to Make a Facebook Frame & Perfect Your Profile Picture
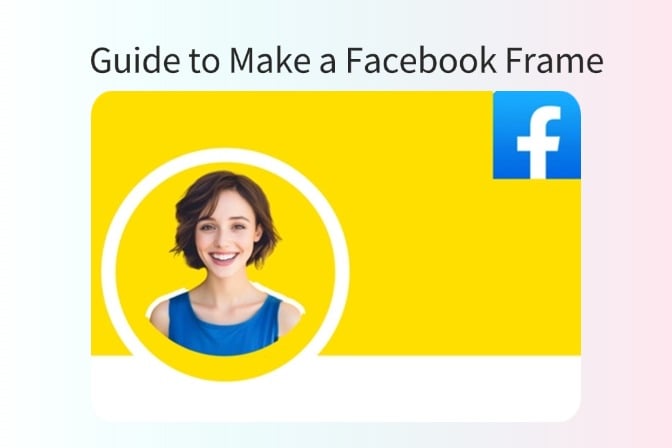
Even with the continuous rise of several social media applications, Facebook still continues to be a central hub for social interaction on the internet. However, because of its massive user base, you might encounter some struggles if you want to stand out. Well, one creative way to personalize your experience and be unique is through creative Facebook frames. In this article, you'll learn how to make a Facebook frame that conveys your personality and makes your profile pop.
Table of Contents
Part1 How to Make a Facebook Frame
To place it in simple terms, a Facebook frame is basically an overlay above your profile picture or any image that you use in a post. It lets you add a personal or even promotional touch to your photos. Now, you might wonder: how can I create a Facebook frame? Well, it might seem daunting at first but it is actually relatively easy. Here's how:
Step 1: Go to Facebook Frame Studio
First, you need to access Facebook Frame Studio. You can do this by going to the Facebook for Developers section. There, you then need to locate and click on the "Camera Effects" platform to begin your process on how to create a Facebook frame.
Step 2: Create a Frame
Once you're in the Frame Studio, find and select "Create a Frame". You can now start designing your frame where you'll be given a choice as to who will own the frame, either your personal account or a page that you manage.
Step 3: Upload your Design
Facebook Frame Studio does not allow you to design on the platform itself which means you will have to design your frame on separate applications like Canva or Photoshop. After you're done designing, save it as a PNG with a transparent background. You can then upload your newly created frame to Facebook Frame Studio.
Step 4: Adjust the size
Next, start by adjusting the size and position of your image to fit the frame. Luckily, Facebook has a built-in preview tool that you can use to see how your frame looks on different devices, giving you a chance to optimize it for both mobile and desktop.
Step 5: Name your frame and submit
Finally, you can name your frame and finalize the visibility plus schedule. You can either set it as temporary or permanent. When submitted, the frame will be placed under review by Facebook and will go live once it has been approved.
Part2 How to Make a Facebook Profile Picture Private
Yet there might be moments where you want to limit the users who can view your profile picture. This may be due to several reasons including In order to keep your Facebook profile picture private and control who sees it, follow the steps below on how to make Facebook profile picture private:
Step 1: Go to your profile
In the beginning, you must first go to your Facebook profile and then click on your profile picture. You will be presented with several options where you will then have to select "See Profile Picture".
Step 2: Select your privacy setting
Your next step would be to find the three dots located in the bottom right corner of your profile picture. Click on the icon and then select "Edit Audience" where you will then have the option to choose your preferred privacy setting. If you don't want anyone to see your profile picture click on "Only Me".
Step 3: Save the changes
After selecting your preferred privacy setting, click on "Done" and then finalize your changes. Facebook will then hide your profile picture from the excluded audience.
Part3 How to Make a Temporary Profile Picture on Facebook
Just like a Facebook Frame, you also have the option to upload a temporary profile picture on Facebook. This means that after a designated amount of time, the newly uploaded image will be removed and your original profile picture will be displayed on your account. You can learn how to make a temporary profile picture on Facebook by:
Step 1: Select your profile picture
First, you will have to access your Facebook account and then select your profile picture. After that, click on the "Choose Profile Picture" option. This serves as a gateway to adding a temporary profile picture on Facebook.
Step 2: Choose your option
You will then have to choose between the "Add Frame" option or uploading a new photo. You can also select an old image that you have posted on Facebook. These may include tagged photos, and suggested images by Facebook, or you can manually browse your albums.
Step 3: Select the Make Temporary option
Once you've chosen or uploaded your desired profile picture, select the "Make Temporary" option at the bottom of the editing screen. Then choose how long you want the temporary profile picture to be displayed on your account.
Step 4: Save changes
With the temporary profile now set, save your changes. After your set deadline, Facebook will automatically revert your profile picture to the original and remove the temporary image.
Part4 Facebook Profile Size - How to Make a Pic Fit Facebook Profile
The ideal size for a Facebook profile picture is 170x170 pixels on desktops or 128x128 pixels on mobile devices. If your photo doesn't fit, here's how to make a pic fit Facebook profile using insMind Profile Picture Maker:
Step 1. Upload Your Photo
Start by uploading a high-quality photo to the insMind Profile Picture Maker. Ensure the image is clear and centered, as it will be the main focus of your profile.
Step 2. Select a Template
Choose from a variety of templates that insMind offers. These templates can be tailored to fit different themes or occasions, providing a personalized touch to your profile picture.
Step 3. Customize Your Photo
Adjust your photo's size to meet Facebook's required dimensions. The tool allows you to resize and reposition your image so that it fits perfectly without losing important features.
Step 4. Download and Upload Your Picture
Once you are satisfied with the customization, download the edited photo. Then, upload it to your Facebook profile. The insMind's tool ensures that your photo is optimized for both desktop and mobile viewing, maintaining a professional look across all platforms.
With 4 simple steps, you can easily resize your Facebook profile picture to give it the perfect size on both mobile and desktop. With insMind's Profile Picture Maker, you won’t need to manually crop and edit your image. In just seconds, you can achieve Facebook’s ideal size.
Part5 How to Upload a Profile Picture on Facebook without Cropping
Uploading a new profile picture on Facebook can sometimes lead to unwanted cropping, which might cut out important parts of your photo. To ensure your full image is displayed exactly as you intend, follow these steps on how to upload a profile picture on Facebook without cropping:
Step 1. Prepare Your Image
First, use an image editor to adjust your photo to the exact dimensions recommended by Facebook. This would be 170x170 pixels for desktop use and 128x128 pixels for mobile. By doing this, you can avoid any automatic cropping or resizing when you upload the image.
Step 2. Upload the Photo
When your photo is ready, go to your Facebook profile, click on your existing profile picture, and choose "Upload Photo". Then select the pre-sized image file you've prepared.
Step 3. Confirm Your Upload
With the image pre-sized to Facebook's specifications, it will be uploaded as is, with no need for further cropping or adjustment. If you're looking for additional help or step-by-step visuals, check out various tutorials on YouTube that detail the process, ensuring your profile picture looks exactly as you planned.
Part6 The Best Photo Editor for TikTok
For TikTok users looking to enhance their media, insMind offers several specialized tools. Each of these features is designed with user-friendliness in mind, allowing even novices to produce professional-level edits effortlessly. Whether you're enhancing photos for Facebook or creating vibrant videos for TikTok, insMind provides the tools you need to express your creativity without complications.
Photo Collages Maker
Create visually engaging collages by combining multiple images. This tool is great for making thematic or event-specific posts that capture attention.
Image Background Remover & Generator
Remove or alter the background of your images or videos with ease. This feature is particularly useful for creating standout content that focuses solely on the subject.
AI Filters
Apply advanced filters to your photos and videos to instantly enhance their appeal. These filters can adjust lighting, add effects, or refine the overall aesthetics, making your content more engaging.

Conclusion
Whether you’re looking to spruce up your Facebook profile or create engaging content for TikTok, insMind provides a suite of tools to enhance your social media presence. From creating Facebook frames to editing profile pictures perfectly, insMind simplifies digital creativity. Give it a try and see how easy and effective enhancing your online photos and videos can be.
Ryan Barnett
I'm a freelance writer with a passion for editing and designing photos. Here at insMind, I strive to educate users on image creativity, photography, and enhancing product photos to help grow their businesses.



















































![How to Add Logo to Photos Online for Free [The Simplest Method] How to Add Logo to Photos Online for Free [The Simplest Method]](https://static.xsbapp.com/market-operations/market/side/1718795949162.jpg)
![How to Remove Tattoos from Photos [Ultimate Guide 2024] How to Remove Tattoos from Photos [Ultimate Guide 2024]](https://static.xsbapp.com/market-operations/market/side/1718787534476.jpg)
