How to Sharpen an Image in Photoshop and Easier Way for Beginners
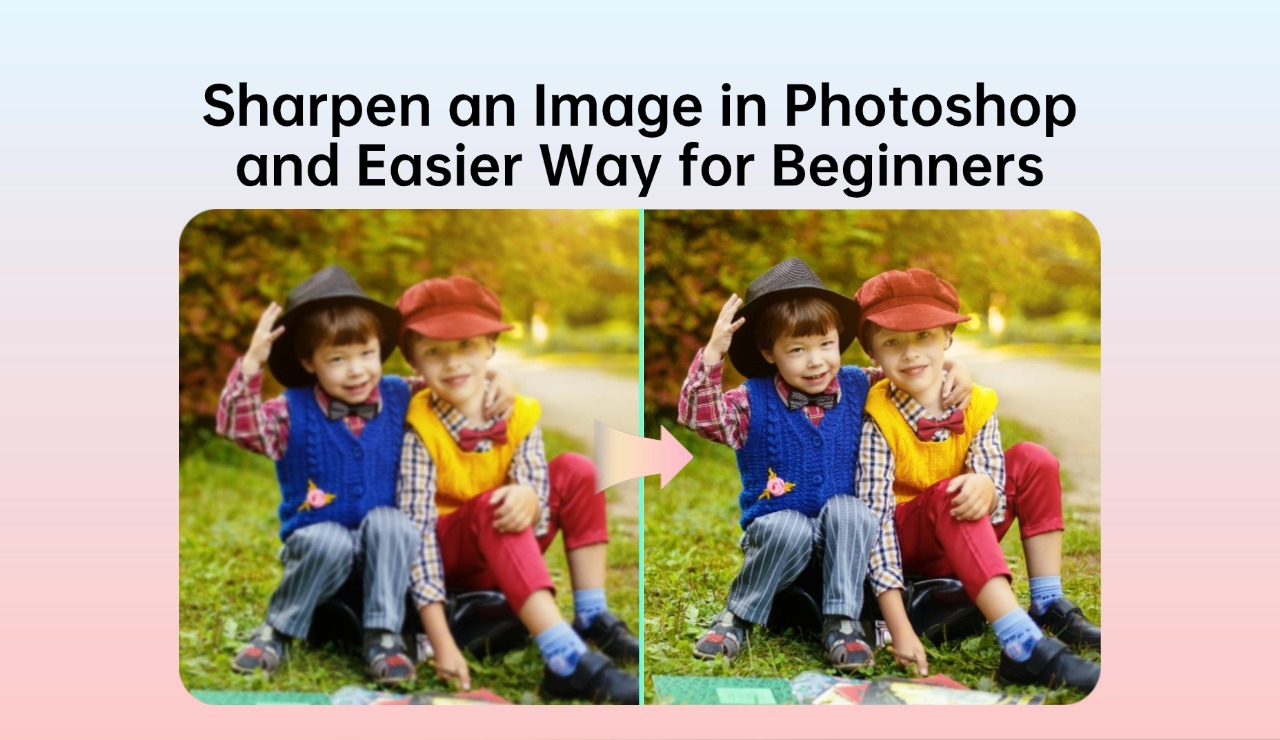
In photography, the perfect moment is often caught, but we forget things such as low light, motion, or poor focus leaving us with blurry images. The primary solution for improving image clarity, and contrast, and refining fine details is sharpening.
This article shows how to sharpen images in Adobe Photoshop and AI-powered sharpening methods for beginners. With insMind’s AI Photo Enhancer, anyone can now restore and enhance their images easily. It does not require any technical expertise or prior experience from you. Hence, allowing everyone regardless of their knowledge of image editing to sharpen images and make them look more professional.
Table of Contents
Part1: What Is Image Sharpening?
Image sharpening is a technique for improving the sharpness of an image by increasing the definition of its edges. Identifying contrasts between pixels and amplifying these differentials, makes the image countenance crisper. When it comes to recovering highly out-of-focus photos, sharpening cannot fully bring them back. However, it's ideal for minor blurriness, soft edges, and bringing fine details forward.
Applications of Image Sharpening:
There are different use cases where image sharpening can be very useful. Below we have listed some common applications of image sharpening one of which you may also find relatable for your requirements.
Correcting Blurriness:
It fixes soft focus images from camera shakes or wrong settings. Hence, it helps make the blurry images into professional ones without hours spent on editing.
Improving Contrast:
It improves the contrast between bright and dark areas for better visible impact. This way, it improves the overall visual appeal of boring images.
Refining Details:
Provides for excellence of texture, pattern, and fine detail to produce professional results.
Part2: How to Sharpen an Image in Photoshop
And image sharpening has several great ways offered by Photoshop. These methods are created to each offer their precision and customization for the photographers, as well as the designers.
a. Camera Raw Filter
The Camera Raw filter is a great tool to sharpen and generally give an image a bit more attractiveness.
Steps to Use the Camera Raw Filter:
1. Place your photo in Photoshop and convert its layer to a Smart Object for editing.
2. Select Filter > Camera Raw Filter.
3. Better clarity can be achieved in the Detail tab by changing the Sharpening slider. To control how far the sharpening goes, you may use the Masking slider to vectorize the areas you want to sharpen. Play around with other sliders such as Contrast and Brightness alongside the sharpness sliders.
4. See the changes before applying the edits.
Pro Tip: Zoom in to see details in high-resolution images to get the best sharpness. This way you can fine-tune image details in a much better manner.
b. Unsharp Mask
So, even though this mask has a name that basically means the opposite of what it could serve it is undeniably one of the best sharpening options available in Photoshop.
Steps to Use the Unsharp Mask:
1. Go to Filter > Sharpen > Unsharp Mask.
2. Adjust the following sliders: Amount: Sets the amount of sharpening. Radius: Allows the size of the sharpened edges to be determined. Threshold: Describes this option which specifies how much contrast between pixels needs to exist to apply sharpening.
3. Fine-tune everything to make the image look more natural.
Pro Tip: Don't over-sharpen as you can introduce noise and funny-looking halos around objects.
c. Sharpen Filter
For slight adjustments take the Sharpen Filter as a quick tool.
Steps to Use the Sharpen Filter:
1. Go to Filter > Sharpen > Sharpen.
2. Apply a filter with it, and Photoshop will automatically apply an edge enhancement to the edges so they're clearer.
Pro Tip: This tool can now be used, to duplicate the layer before which will allow for future adjustments while maintaining flexibility.
d. High Pass Filter
Advanced control makes for the High Pass Filter, which sharpens the details and keeps the overall composition.
Steps to Use the High Pass Filter:
1. Duplicate your image layer then convert to a Smart Object.
2. Go to Filter > Other > High Pass.
3. Simply adjust the radius slider to get rid of the edge you want to sharpen.
4. The blending mode of the layer should be changed to Overlay or Soft Light.
5. You can use a mask to select a specific range to sharpen.
Pro Tip: For finer details use a smaller radius and for the broader edge use a larger radius.
Part3: How to Sharpen a Blurry Image with AI Photo Enhancer
If you're a beginner or want to learn a simpler alternative, then how recent insMind's AI Photo Enhancer is a great way to implement that. With these tools, advanced algorithms link to user-friendly and even allow users to create professional results without the steep learning curve of Photoshop.
Features of insMind’s AI Photo Enhancer:
There are multiple ways how insMind makes things better and more efficient for you and one of them is through its advanced features. Below are some of the best features that you can enjoy when using insMind’s AI Photo Enhancer.
One-Click Sharpening:
Unblur instantly with minimal effort, and increase image quality. It also means that you do not need to learn to use any tools or spend hours enhancing your images.
User-Friendly Interface:
To allow everyone without technical skills to use sharpening of images. Whether you are a beginner or a professional editor, you will get the same experience and the same results.
AI-Powered Precision:
Identifies and corrects blurred areas automatically, while maintaining a 'natural' look.
Steps to Use insMind’s AI Photo Enhancer:
Below is a step-by-step guide on how you can use the free image enhancer tool from insMind.
Step 1: Access AI Photo Enhancer Tool in insMind:

First head to the insMind AI Photo Enhancer platform.
Step 2: Upload Your Image:

Then put up your photo. Choose high-resolution images to get the best results when using the sharpening.
Step 3: Select the Sharpening Option:

Click on the Unblur Image or the Sharpen Image tool. It’s allowed to use the preview feature to see before and after results side by side.
Step 4: Adjust Settings:

See if you can get the sharpness level the way you want. To keep things flowing, further enhancement can be provided using additional tools such as brightness and contrast adjustments.
Step 5: Save and Share:

Download the image for further use in the desired format. Share it on social media or integrate it into your projects as you want.

Comparison of AI tools with Photoshop for sharpening.
For image sharpening, Photoshop and AI tools are both strong and offer advantages for sharpening. Here's a quick comparison to help you choose the best option:
|
Feature |
Photoshop |
AI Tools (insMind) |
|
Learning Curve |
A steep learning curve requires prior knowledge. |
Minimal, designed for beginners. |
|
Customization |
High customization control, and manual control over settings. |
Moderate, automated adjustments. |
|
Efficiency |
Time-consuming for beginners. |
Fast, one-click solutions. |
|
Cost |
Expensive, subscription is required. |
Free for everyone to use without any subscriptions |
|
Precision |
Advanced, suitable for professionals. |
Advanced, user-friendly precision. |
Comparing Photoshop and insMind for sharpening shows that insMind is a better option for most users. Its user-friendly interface cuts out the steep learning curve present in Photoshop and through one-click solutions saves time without compromising on precision.
For pros with customization, Photoshop is a good option, while insMind has great AI-driven adjustments that are both affordable and for beginners as well as advanced users. If you want minimum effort, high-quality results, and cost-effectiveness insMind is the perfect tool to sharpen images.
Part4: Effective image sharpening tips
Regardless of the tool you choose, these tips can help you achieve the best results:
1. It starts from High Quality Images
The better the results, however, the more original you need your photo to be. The winning criterion is best achieved with images of high quality and minimum noise.
2. Avoid Over-Sharpening
Sharpening too much can add artifacts and halos to your image so that it looks unnatural. Instead, use masking to target areas.
3. Use the Noise Reduction along with Sharpening
Noise comes with blurry images. With noise reduction tools to achieve a balanced or polished look with pair sharpening.
4. Experiment with Settings
Each image is unique. Take a look at your analysis through the eyes of a slider and a filter, until you achieve the ideal balance of sharpness and naturalness.
Part5: Image Sharpening – Advanced applications
Fixing blurriness is the first but only one thing that image sharpening can do. Here are some advanced applications:
1. E-Commerce Photography
By sharpening the product images, you draw the potential buyer's attention to the textures and details.
2. Professional Portraits
Get that professional skin tone, and enhance facial features and hair details as you capture professional-grade portraits.
3. Digital Art and Design
Create a finished look to detailed, intricate artwork in the digital realm.
4. Landscape Photography
Boost the textures in rocks, trees, and clouds to make your landscape photos look three-dimensional.
Conclusion
Image sharpening is a skill every photographer, designer, or anybody wanting to improve photo clarity must learn. Photographer of details, as well as having a professional eye for detail, Photoshop offers tools like the Camera Raw filter, The Unsharp Mask, and a High Pass filter. Unfortunately, these tools do have a learning curve and require hand adjustments.
AI-powered platforms like insMind’s image quality enhancer are useful for beginners and for those who don't have the time to do it manually and find faster solutions. insMind makes it easy for everyone, with just one click of sharpening, to turn blurry photos into high-quality images.
Combining the advances of modern AI with traditional Photoshop, you can pick the suitable way to your aim depending on your level of expertise. From sharpening tools to enhance a cherished memory to the clarity and detail every great image deserves, sharpening tools offer the perfect details every time.
Ryan Barnett
I'm a freelance writer with a passion for editing and designing photos. Here at insMind, I strive to educate users on image creativity, photography, and enhancing product photos to help grow their businesses.



























































![How to Add Logo to Photos Online for Free [The Simplest Method] How to Add Logo to Photos Online for Free [The Simplest Method]](https://static.xsbapp.com/market-operations/market/side/1718795949162.jpg)
![How to Remove Tattoos from Photos [Ultimate Guide 2024] How to Remove Tattoos from Photos [Ultimate Guide 2024]](https://static.xsbapp.com/market-operations/market/side/1718787534476.jpg)
