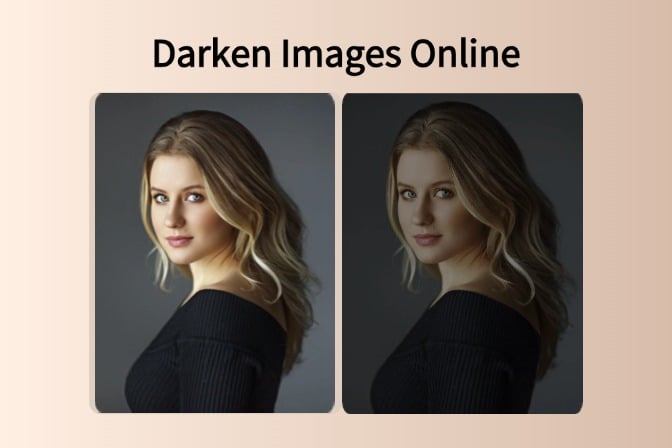
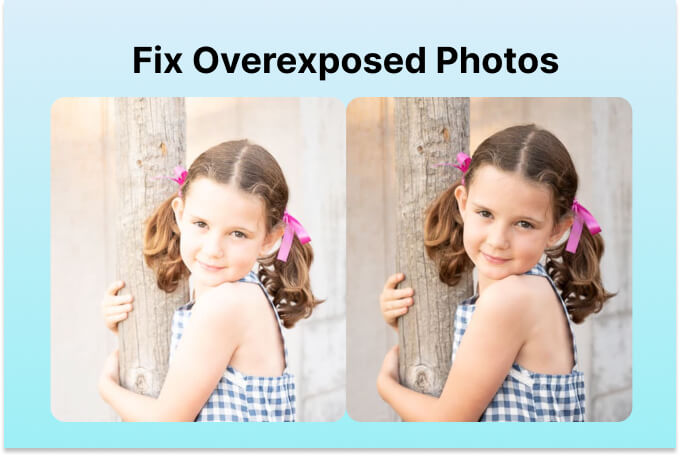
You can correct the error of having overly bright images through online solutions in a simple manner. These photos can be a result of too much light or settings that have been selected on the camera. The tools make the whole picture darker by turning the contrasts lower in the shade and the highlights less bright in the shade. This can alter the photo's mood, giving it a dramatic or mysterious look.
You can also use darken photo to correct pictures containing over-exposed and under-exposed areas. This ensures that all parts of the photograph that are essential to be seen are easily visible, and the image will appear balanced. There are many online applications for darkening pictures, most of which are free. This makes an image darkener ideal for individuals wishing to edit their photos without requiring complex software.
Table of Contents
Part 1. Why Darken an Image?
There are several uses when it may be necessary to alter the darkness of an image. One of the primary reasons is to address a lighting issue. If a picture had been taken in bright light, it might have turned out to be light and washed out more in the brighter areas. Adjusting the brightness can make these details come back and make them visible, thus achieving a better balance.
You can also darken images to get a feel of something. For instance, when the image is dark, it is possible to notice that its overall feeling is mysterious, dramatic, or even suspenseful. This can be useful for certain styles of photos, such as portraits or nature images. Blurring an image can also assist people in studying a particular area of the picture. The main subject becomes more pronounced by making the background darker. It is possible to make certain image areas darker using the online editing features. This helps balance the light and make your product look more professional.
Part 2. How to Darken an Image Using insMind?
Step 1: Access the Image Darkener Tool
First, go to the insMind image darkener. You can find it on their website.
Step 2: Upload your photo

Once there, click the "Upload Image" button. This will open your device's files, allowing you to choose the picture you want to make darker. Find the photo you want and click "Open" to upload it.
Step 3: Adjust Brightness

After uploading your photo, you'll see it on the screen where you can edit it. The Brightness slider controls how light or dark the entire picture is. Moving the slider left makes the whole image darker. Moving it right makes the picture brighter.
Step 4: Downloading the final image.

When you're happy with how dark your image looks, click the "Download" button. This will save the edited version of your photo to your device. You can pick a location to save it and give it a new name.
Part 3. Tips for Effective Image Darkening
Special Darkening:
Target specific regions rather than trying to darken the entire picture at one time; this allows you to keep details in a critical brightly lit region while other areas look comparatively darker. To do this, many photo editing programs, for instance, offer features such as coloring outside the lines guides or layer changes. Coloring outside the lines guides enables you to selectively paint over areas you want darker.
It helps identify certain elements or limbs in the image being viewed. The layer changes allow you to create a new layer solely for darkening over your first image. This allows you to adjust the amount of darkening while keeping the original image information intact. You can regulate how transparent the darkening layer will be to balance the strength of the effect.
Curves Adjustment:
The curves adjustment tool allows you to precisely define the brightness or darkness level of the picture's smallest area. By tweaking the curve, you can make some brightness levels darker. For instance, when you drag a dot down in the middle brightness area of the curve, you darken those middle tones while leaving the highlights in the brightest section and the shadows in the darkest section.
This method is most effective for slightly darkening or darkening particular color ranges. Every color group in an image provides different amounts of brightness information to the whole picture. It is also possible to fine-tune the curves for individual color ranges, which helps to achieve more accurate darkening effects.
Lighten and Darken Tools:
Brightening and darkening are intended to make portions of an image lighter or darker, respectively. They operate analogously to motion picture photography's lightening and darkening tools. Hiding involves diminishing the intensity of a particular area when developing a picture, and it will appear less intense on the final print. Burning means making the selected region brighter and, therefore, the darker region in the final picture.
The lighten tool in digital editing software lightens regions by reducing their lightness, which, in a way, makes them lighter. The darken tool does the opposite. These tools enable excellent control of the darkening, especially for details or specific areas such as shadows of the object or the highlights on the face.
Brightness Adjustment:
While adjusting the brightness might seem the easiest way to darken an image, it's essential to be aware of its limitations. While it will darken the entire image by decreasing the brightness value, it can also make the brightest areas turn entirely black and the darkest areas utterly white with no detail. This can happen when the brightness value is adjusted too much. If you choose to use brightness adjustment, it's recommended to use other techniques, like coloring outside the lines guides or curve adjustments, for more control. This allows you to darken specific areas while protecting the details in the highlights and shadows.
Colour Groups:
Images typically have red, green, and blue color groups. Each group contributes varying amounts of brightness information to the overall picture. Adjusting the individual color groups can be a powerful way to achieve selective darkening. For instance, darkening the blue group can create a cooler and moodier image, as blue tones are often associated with coolness.
On the other hand, darkening the red group can add warmth, as red tones are often associated with warmth. Experimenting with adjustments in each group can help you achieve your desired darkening effect. You can also darken a particular color within an image by adjusting the color itself, the intensity of the color, and brightness values.
Part 4. Creative Uses of Darkened Images
Photography: Enhance professional or personal photos

Reducing the brightness of some places in a photo can help to attract attention to the main subject and make the image look more intense and impactful. This works well, mainly on people's photos where a dark background enhances the person's contrast. It can also be used in images of nature where one wants to focus on a tall mountain or a single tree amidst clouds. On purpose, the parts of the image can be made darker to make the pictures more attractive to the people watching them.
Social Media: Add a sophisticated touch to your posts

If you want your social media posts to be a bit darker, you can make them more mature or stylish. This is especially good for places like Instagram or Pinterest, where pictures are essential. You can darken the background of your photo or make the whole image a bit darker, and your text or product will become more prominent. Also, people tend to crave something a little dark; they may think it is luxurious or exclusive, increasing the chances of people liking and sharing your content.
E-commerce products Marketing: Use for product photography to focus on critical features

Making the backgrounds of product pictures darker may be an effective weapon for those companies that sell things online. Darkened pictures take out elements in the background that may discomfort people as they concentrate on the product and the elements that set it apart. This is particularly useful in cases where the product has numerous fine or complex line features. Also, a darker background may make people feel that the product is more professional and of higher quality, entailing their decision to purchase it.
Conclusion
Bright photos can be improved with image-darkening tools. These darken photo tools make the picture darker to get your desired look. Starting with a good photo and using simple sliders is a great way to darken your image. Remember to watch the light and colors to keep the photo looking natural. Some tools have more settings for advanced users. Save your work often so you can pick the best version. To quickly darken photo, try the free insMind tool.
Ryan Barnett
I'm a freelance writer with a passion for editing and designing photos. Here at insMind, I strive to educate users on image creativity, photography, and enhancing product photos to help grow their businesses.




































































![How to Add Logo to Photos Online for Free [The Simplest Method] How to Add Logo to Photos Online for Free [The Simplest Method]](https://static.xsbapp.com/market-operations/market/side/1718795949162.jpg)
![How to Remove Tattoos from Photos [Ultimate Guide 2025] How to Remove Tattoos from Photos [Ultimate Guide 2025]](https://static.xsbapp.com/market-operations/market/side/1718787534476.jpg)
