Photo collage allows you to show your memories and share precious moments in one frame without messing up your social feed. For this reason, many people want to try turning their pictures into creative collages. However, choosing the right tool can become daunting because of the wide range of options.
Hence, for your assistance, various tools have been introduced in this guide to help you learn how to make a photo collage. By picking the reliable one, users can edit their photos in various layouts, shapes, and styles, such as alphabet or heart-shaped collages. So, read the article and see how you can create a compelling collage with top-rated solutions.
Table of Contents
- 01 Create a Photo Collage Effortlessly with insMind
- 02 How to Make a Photo Collage from Templates
- 03 How to Make a Picture Collage in Photoshop
Method 1. Create a Photo Collage Effortlessly with insMind
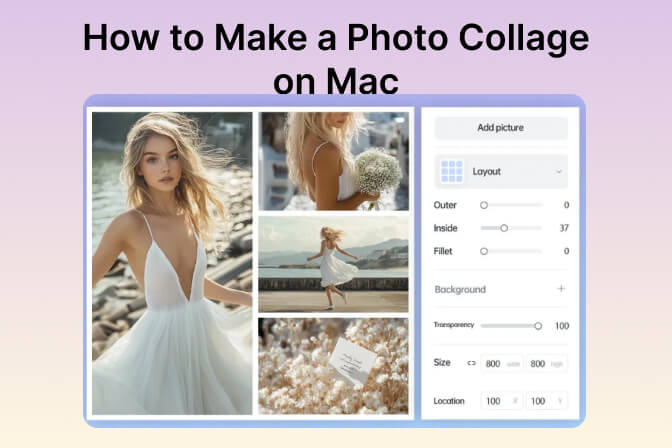
One of the most popular and efficient photo collage makers available online is insMind. This tool allows you to add up to 16 pictures to one photo and turn it into a beautiful collage. It provides horizontal and vertical grid layouts for users to choose the desired one. Furthermore, with the Margin tool, you can easily add the borders in your collage.
This AI-powered tool lets you generate AI backgrounds and even upload pictures as your collage background. In addition, features like padding and corner radius can be used to add space between the pictures and round their corners. Users can add text with different styles, fonts, and colors to make it more creative. Now, let's try this tool and learn how to make a picture collage using all the features mentioned above.
Step 1. Browse the insMind Tool' Photo Collage Maker
Search the insMind tool on the browser, and then access the Photo Collage Maker page. After that, click the "Upload Photos" button to fetch all the pictures you want to include in the collage.

Step 2. Pick Your Desired Layout From Grid
On the next screen, tap the image and access the "Adjust Layout" icon to change the collage layout. Upon tapping, a pop-up menu named "Splicing Layout" will open on the right side, letting you choose the desired style from the given options.

Step 3. Adjust and Add Customization Elements
Afterward, adjust the grid by clicking the "Margin" tool from the right side. Then, alter the "Padding" and "Radius Corner" sliders to smoothen the edges of the pictures for a polished look. Next, on the left side, access the "Text" icon and choose the text style from the list.
Then, tap the text, click the "Wrap Text" option from the right menu, and select the suitable option to modify the text further.
For the backgrounds, select the "Background" tool from the left side to enhance the collage appeal. There, you will get a list of options from where you can add a stunning background color of your choice.

Step 4. Download the Result on Your Device
Once you are satisfied with the results, click the "Download" button at the top right corner of the screen. From the menu box that opens, choose the format and quality of the image, and then once again hit the "Download" button to save the final collage.

With the steps mentioned above, one can quickly learn how to make a collage photo using an insMind collage maker and turn pictures into impressive collages. You can edit everything with one tool, from customizing the background to editing text style, font, and color. With the features mentioned above, you should definitely try insMind if you are looking for a reliable tool.
Method 2. How to Make a Photo Collage from Templates
In addition, insMind has a library of templates in its workspace that you can choose to turn your photos into a heartwarming collage. Hence, the following are detailed guidelines on how to add your pictures to insMind's stunning templates:
Step 1. Open the insMind Workspace and Choose Template
Open insMind on your device, head to its workspace, and then scroll down to find the collage photo templates. Select the desired template according to the number of your pictures to start making an appealing snap.

Step 2. Replace the Photo and Other Customization
Once chosen, click the "Replace" button on the right side of the screen and replace the pictures from the pop-up window.
Moving on, from the dialog box that appears, choose the images and tap the "Upload Files" button in the corner of the box. Similarly, replace all the pictures from the Template with your photos individually.
Then, choose the "Text" tool from the left slide and add the caption according to your preferences. After that, edit the color of the text on the right side to enhance its visibility.
Besides text, tap the "Sticker" tool and scroll down to select the desired sticker that best suits your pictures from the various options given.
 Image name: how-to-make-a-photo-collage-11.jpg
Image alt: access sticker icon to add one
Step 3. Save the Final Template on Your Device
After getting the desired results, click the "Download" button, and a drop-down menu will open where you can select the format and quality of the image. Once done, hit the "Download" button again to save the end results.

With the insMind Photo Collage Maker workspace, you can create visually appealing photo collages for every occasion. Moreover, it allows you to choose the format of the image and download it in high resolution. Hence, insMind is the best option for someone who wants to learn how to make a collage in photos and make their memories into meaningful and lasting treasures.
Method 3. How to Make a Picture Collage in Photoshop
Another powerful tool besides insMind is Adobe Photoshop, which lets you edit your photos and turn them into beautiful collages. Its extensive features allow users to add multiple images in various layouts to make a perfect collage. In addition, you can adjust the picture size and fit it according to the desired design. Moreover, it offers text and graphics features to add personalized text, shapes, and graphics.
This tool also supports high-quality output, which ensures that your collage looks smoother and cleaner. Photoshop allows you to apply artistic filters and effects to make it look aesthetic and unique. With these features, if you want to learn how to make a photo collage using Photoshop, follow the guidelines given below:
1. Open the tool on your device and tap the "File" tab at the top left corner to select the "New" option from the list to create a new document. From the newly opened screen, you can choose the desired width and height of the file to start creating a collage.
2. Then, create the grid by locating the "New Guide Layout" from the "Guide" option under the "View" section. Afterward, this will fetch a pop-up menu where you have to pick the desired number of columns and rows.
3. Moving forward, set a certain shape of the grid and ensure that the default shape has no stroke. Once configured, pick the desired color of shapes that will be replaced by the image while creating a collage.
4. Next, check the "Snap" option in the menu by navigating it from the "Snap To" option under the "View" section. Once done, use the rectangle tool and draw the shape inside the grid while snapping into the guides of the document.

5. After creating the first shape, duplicate the layer and drag it on the grid box by choosing the "Move" tool and pressing the "Alt" key on Windows. For Mac, select the "Opt" key to move all the shapes simultaneously.
6. Now that you have duplicated the shape, you can start generating a photo grid by picking the "Clear Guides" option from the "View" section. Moving on, access the image folder on your device and drag and drop the image to the preview window while pressing the keys. This will create a clipping mask, after which you can view uploaded images in shape layers.

Conclusion
To sum up, this article has given you the best tools to create stunning photo collages. You can turn different sizes of pictures into one frame with text and stickers and personalize them as you want. With the stepwise guide, you've learned how to make a collage photo, and if you are confused about which tool you should use to create a collage, we suggest you try insMind.
Ryan Barnett
I'm a freelance writer with a passion for editing and designing photos. Here at insMind, I strive to educate users on image creativity, photography, and enhancing product photos to help grow their businesses.













































































![How to Add Logo to Photos Online for Free [The Simplest Method] How to Add Logo to Photos Online for Free [The Simplest Method]](https://static.xsbapp.com/market-operations/market/side/1718795949162.jpg)
![How to Remove Tattoos from Photos [Ultimate Guide 2025] How to Remove Tattoos from Photos [Ultimate Guide 2025]](https://static.xsbapp.com/market-operations/market/side/1718787534476.jpg)
