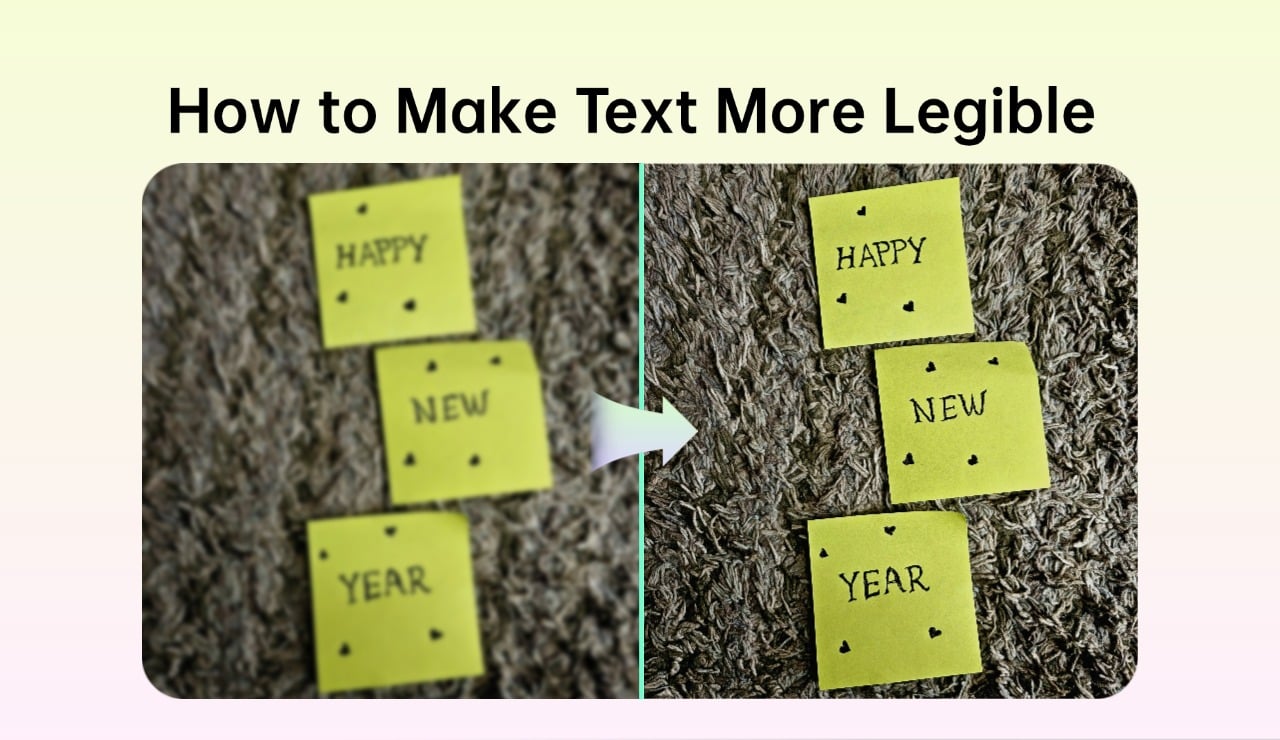
Blurry text is enough to cause a lack of professionalism and satisfaction whether you're trying to read a scanned document, see text in photos, or want to make those pesky online posts easier to read. Luckily, tools and techniques for sharpening text have progressed to make that easy and convenient.
Restoring the clarity can be the job of the insMind Unblur Text Image tool, as well as Photoshop and others if you're a professional working on critical documents, or a regular user struggling with readability. In this guide, we'll look at some of the more common reasons for text to blur, tried and tested ways to sharpen images of text, and ways to present crisper text images.
Table of Contents
Part 1: Blurry Text Images common issues
There are many reasons why your images can develop blurry text, and none of them help with legibility. The first step in solving this problem is understanding these causes.
· Scans or Photos of low-resolution
Pixelation forms when low-resolution images are scanned or captured in low resolution, resulting in stretched pixels when they are magnified to at least 300% of normal size and they become not readable text. Saving storage costs always comes at the cost of quality, as low-resolution settings are used so frequently to reduce the file size.
· Compression Artifacts
Images can in fact suffer from compression artifacts when you save them in compressed file formats like JPEG. The distortions it produces cause the image to become 'blurry' and look very unprofessional with noise at the text edges.
· Poor Lighting or Camera Focus
The problem with unfocused shots is that you don’t know whether it was caused by inadequate lighting or shaky hands. Clear text is impossible to get without proper stabilization or at least enough brightness, resulting in blurry output.
· Incorrect settings during capture.
Poor image quality caused by poor text can be due not only to subject movement but rather to using wrong settings such as setting a high shutter speed or improper ISO level.
Impact of Blurry Text
The blurry text in the image can have a negative impact in multiple ways including the following:
· Difficulty in Reading
Text that’s blurry strains the eyes as it makes reading difficult; and more so for people with visual impairments. In some cases that can be critical, misunderstandings can result from misinterpreting unclear words.
· Reduced Professionalism
Blurry text shared or presented in business settings will undermine credibility. Professional and detailed presentation is achieved by providing clear, sharp images.
· Decreased Accessibility
Unreadable text prohibits users from effectively accessing key information and can have negative impacts on important things like schoolwork and legal documents.
All of these share one thing in common — if you address them using proper tools and methods you can be sure that the text in your images will always be clear and readable.
Part 2: Sharpening Techniques for making text images sharp
There are a bunch of ways to do it, from professional-grade software to just simple online tools. There are various methods and some provide advanced editing, some add AI-powered enhancements, and some sports user-friendly interface.
We have provided a detailed introduction and step-by-step guide below to each tool, so that you may determine which is suitable for your text enhancement needs.
Adobe Photoshop
Adobe Photoshop is an industry-standard image editing software noted for its finely tuned precision and extreme versatility. Its advanced tools for text images that have become blurry is what it gives and it's a favorite among graphic designers, photographers, and creative professionals.
It has an extensive feature that offers a text clarity boost and removes noise and contrast from the text. However, if you're new to Photoshop, it's a bit overwhelming at first because it's quite complex.
Steps to Sharpen Text Images
Follow the steps below to sharpen text in your images with Adobe Photoshop:
1. Open Photoshop and load up the blurry text image.
2. You can work on your original image layer, by creating a duplicate of it.
3. Click Filter > Sharpen > Unsharp Mask. You can adjust the Amount, Radius, and Threshold sliders until the text turns clear.
4. To further adjust things, use Filter > Sharpen > Smart Sharpen. Set the clear settings to the best.
5. Finally, save it in a high-quality format such as PNG.
Features
· The ability to use advanced sharpening filters for a perfect amount of control.
· Preservation of original images in layer functionality.
Use Case
It's a very good tool for designers and professionals who need high-quality image editing.
GNU Image Manipulation Program ( GIMP )
Awesome open-source alternative to Photoshop! GIMP is a free sharpening, cropping, and editing tool. Besides supporting multiple file formats and editing features like a customized sharpening filter, it is easy to use.
GIMP offers a good balance of professional-level functionality and usability for this type of user, at the same time. It is a very straightforward interface that is ideal for new and expert editors alike.
Features
· A robustly featured open-source tool for sharpening.
· A beginner and advanced user-friendly interface.
Use Case
A cheap Photoshop alternative for basic and intermediate work.
Topaz Sharpen AI
Topaz Sharpen AI is an AI-based sharpening app made to reduce noise by removing images. It uses machine learning to identify and enhance blurred text in images, getting amazing results.
It’s the perfect tool for professionals who require automated solutions, with minimal manual input. Compared to the Graphene tools it’s a fantastic tool for images that contain text because it has such a dedicated focus on sharpening.
Features
· Sharpening of exceptional quality driven by AI.
· Text enhancement, integrated with noise reduction capabilities.
Use Case
Great for photographers and professionals who want automated text sharpening for the fabulous level of detail.
Pixlr
Pixlr is a lightweight, web-based photo editor that makes text editing a breeze. It is available from your browser directly and doesn't require you to install software.
Having all the basic sharpening tools and other editing features, Pixlr is perfectly suitable for people who want quick changes without using highly advanced skills. Equipped with an easy-to-understand interface, it is perfect for average users looking for a quick and easy fix.
Features
· Essential photo sharpening tools, cloud-based photo editor
· There is no installation required, so it is available for all devices.
Use Case
Perfect for people who want quick changes without having to download heavy software.
insMind Text Enhancer
insMind Text Enhancer is an AI-powered tool that shortens the text sharpening process. It has one-click optimization, which automatically sharpens text clarity, removing noise and setting tone to save the user's hassle.
The tool is available online so anyone can sharpen text images without having to download software. But a guy who is not tech-savvy can easily use this tool to obtain quick and professional results.
Features
· Sharpening and noise reduction using AI.
· Easy one-click optimization for amazing results.
Use Case
Ideal for users who want a simple, fuss-free method to unblur text images online. Non-tech-savvy individuals love it because they don't know how it works and it gives them a quick fix.
Part 3: What is insMind and How to Unblur Text in an Image Online
With the insMind Unblur Text Image tool you can enhance text images online easily. Perfect for achieving sharp results, its intuitive interface and AI-powered functionality made it a solid contender. Below are the detailed steps you can follow to unblur the text in an image with insMind:
Step 1: Access the Tool:

Head to the insMind Unblur Text Image in your browser.
Step 2: Upload Your Image:

Once you have the blurry image, select it and drag and drop it into your list. The insMind AI tool will now automatically unblur your image without requiring any additional clicks or steps.
Step 3: Download the Result:

Check if the before and after versions of the image are clear. Enhanced image pictures can be saved in your choice format (JPEG, PNG).

With these simple steps, insMind makes unblurring your images a hassle-free experience regardless of your expertise with manual image editing.
Part 4: Capturing Clear Text Images: Tips and Best Practices
It's better to prevent your text images from being obscured than to start editing them. To get high-quality text images captured, follow these tips.
Tips for Scanning Text
· Make sure that you set the scanner to at least 300 DPI of sharp and detailed text scans.
· Be sure the document sits flat on the scanner bed to cut out tilted or skewed images.
· Some dust or smudges on the scanner glass can create clarity problems. Scanning while it's still a bit dirty can ruin it and not make good archival material.
Tips for Photographing Text
· Rely on the tripod or hold your hands on a stable surface to avoid motion blur.
· Put the document in well-lit areas. Don't rely on the natural light source only and always have backup with studio lighting.
· To get crisp details reduce ISO, shutter speed, and aperture. To reduce noise, lower your ISO; to avoid blur, take your shutter speed as fast as it can go.
Editing as the Final Step
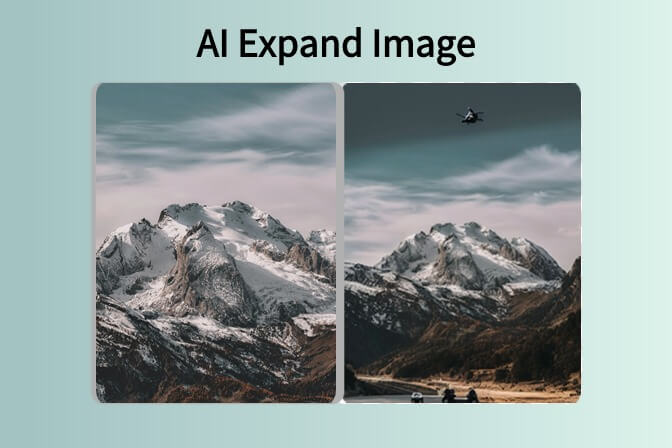
· No matter what you’re trying to capture, minor lessons apply. Try the insMind Image Brightener and AI Expand Image tools to blow blurry text out and improve the brightness.
· insMind Cleanup Pictures is a tool that can remove unwanted marks or artifacts around the text.
· Before using or sharing the image review the clarity of your text.
With good editing tools, you can combine these practices to produce text images that are always sharp, professional text images.
Conclusion
Enhance text in images is a challenge but modern tools and techniques can help you sharpen and improve text. Whether you like advanced software like Photoshop or user-friendly online tools like insMind. Clear text pictures are always better because the text in them is easily readable.
If you understood common causes, used the proper techniques, and practiced the best practices, you would always produce legible, professional quality results.
Ryan Barnett
I'm a freelance writer with a passion for editing and designing photos. Here at insMind, I strive to educate users on image creativity, photography, and enhancing product photos to help grow their businesses.

















































![How to Add Logo to Photos Online for Free [The Simplest Method] How to Add Logo to Photos Online for Free [The Simplest Method]](https://static.xsbapp.com/market-operations/market/side/1718795949162.jpg)
![How to Remove Tattoos from Photos [Ultimate Guide 2025] How to Remove Tattoos from Photos [Ultimate Guide 2025]](https://static.xsbapp.com/market-operations/market/side/1718787534476.jpg)
