Have you grown tired of searching for that perfect photo, only to find it ruined with annoying text? Be it watermarks, captions, or unwanted signs, it can ruin a good photo.
Fear not, because here in this step-by-step guide, we're going to show you how to remove text from photos effortlessly. With the help of insMind and our simple instructions, you will easily and very quickly start editing your photos like a real pro.
Well, let's go ahead.
- Part 1. The Importance of Removing Text from Photos
- Part 2. Introduction to insMind Magic Eraser Tool
- Part 3. Step-by-Step Instructions to Remove Text with insMind Magic Eraser
- Part 4. Tips for Achieving Best Results with Magic Eraser
- Part 5. Practical Applications of Text Removal from Photos
Part 1. The Importance of Removing Text from Photos
Before getting straight to how to remove text from photos, it's better to first understand the importance of doing so.
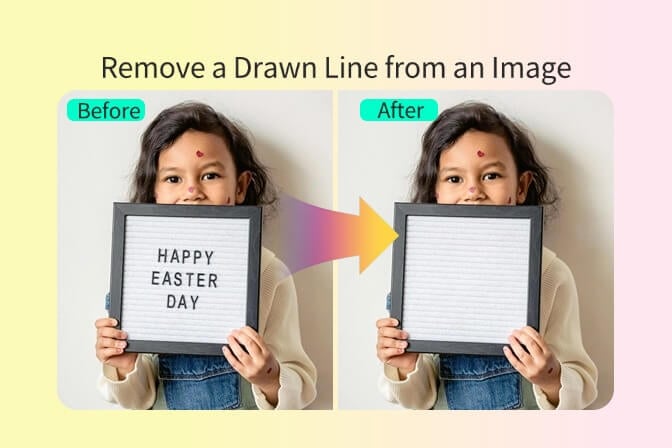
Well, deleting the text from the photos really makes a difference in making the photo much more appealing while keeping the whole integrity of it. Let the viewer concentrate on the essentials without any distraction from this unnecessary text.
This is particularly important when it comes to professional setups, where images are supposed to speak for themselves, and not in artistic pursuits, where the purity of the composition is a high concern.
It can also involve the privacy of individuals when personal information has been mistakenly captured in a photograph. Using the proper tools and techniques, text removal can be done easily with maintenance of the image quality, leaving no distractions within the image.

Now let's see how insMind helps to rid images of unwanted text.
Part 2. Introduction to insMind Magic Eraser Tool
The insMind Magic Eraser Tool is a highly developed utility in the insMind suit designed to allow users to wipe away unwanted elements, including text, on their photos with great precision.
With extremely advanced AI algorithms, the tool can differentiate between text and the underlying image in the photo, thus removing it cleanly and effectively without ruining the rest of the photo.
Part 3. Step-by-Step Instructions to Remove Text with insMind Magic Eraser
Here is an extremely easy step-by-step guide on how you can remove texts from photos in a few seconds:
Step 1. Sign Up/Login
First, visit insMind and log in or sign up. Navigate to the Text Removal Tool to get started.
Step 2. Upload Your Image
Click the upload button to bring the photo you want to edit into the platform.
Step 3. Select and Erase Unwanted Text
Choose the brush tool and adjust its size to suit your needs. Highlight the unwanted text by brushing over it, then press “Start” to activate insMind’s AI-powered text removal.
Step 4. Apply Adjustments
With the text gone, click "Apply" to access the editor. Here, you can fine-tune your image by adjusting opacity, cropping, or using the smart-crop feature to improve the composition.
Step 5. Download Your Clean Image
Once you’re satisfied with your image, hit "Download". Your photo will now be text-free and ready for any application, from professional uses to personal archives.
Part 4. Tips for Achieving Best Results with Magic Eraser
Here are other tips that may help you to get the best magic eraser results apart from the above steps:
1. Start with High-Resolution Images:
Before proceeding to remove the text from the image, ensure you are using high-quality pictures. High quality will provide pinpoint clarity while helping the AI to pick up the text and erase it correctly. For this, more details can be shown to make the magic eraser easily remove the overlaid text but remain normal for the quality of the image.
2. Ensure Text Visibility:
To maximize the effectiveness of the Magic Eraser, please ensure your text is recognizable by the image. If your text is too small or hidden by other elements, then it is not detected properly for erasing, or, worse still, it gets removed by mistake. Making the text recognizable will then allow the AI algorithm to properly identify and target the exact text to remove.
3. Use Refining Tools for Complex Backgrounds:
With more elaborate backgrounds, or intricate details, the Magic Eraser might not always provide perfect results in a single click. Use the manual adjustment tools to fine-tune the removal process. The text having been erased, it is possible to fine-tune the surrounding with the refining tools to have a harmonious and smooth appearance of the background. This step is extremely important, especially to maintain the overall integrity and aesthetic of the image, particularly when dealing with intricate backgrounds or overlapping elements.
Use these tips and the magic in the Magic Eraser to get professional-level results when erasing text from your photos. Whether you are retouching product photos for an online store or editing your favorite photography collection, with these strategies you can ensure the best results: clean, text-free images.
Part 5. Practical Applications of Text Removal from Photos
It's not just for aesthetics, but text removal is very practical in many situations.
1. Travel Photography:
Taking beautiful landscapes or historic monuments of your travel but getting unwanted text or signboards into them sucks the beauty of the scene. In turn, one can make their travel photos stunningly visual by removing text, which will keep the viewer engaged in the scene without any distractions.
2. Restoration of Old Photos:
Old photos usually come with date stamps, captions, or some hand-written notes, which are a sign of time. Such photos could easily be restored to their original appeal with text-removal tools to discard those unwanted distractions and save the nostalgia of the moment captured.
3. Confidential Information:
In an age where information privacy is of top priority, text removal ensures that sensitive details are safeguarded in screenshots or digital documents. Whatever needs to be done—whether personal details, financial information, or confidential notes—text removal assures that only the relevant content is shared, reducing chances of data theft or unsolicited access.
4. Professional Applications:
This opens possibilities for professionals in graphic design, photography, and marketing, among other fields, with clean and uncluttered images to better pass across their messages. This eliminates distractions that may make the project overly busy and, therefore, holds focus on the message.
Deploy text removal techniques to help your pictures speak across varied contexts and applications; make powerful visual narratives touch lives the right way.
Conclusion
Thus, it is very easy to remove text from photos. Follow all the steps provided above with carefulness, and you are good to go in order to get clean professionally done images quickly.
So go ahead and try insMind Magic Eraser! Just try with a few images. Make a stab at realizing what your tool can do, and give free rein to your creativity.
With the knowledge gained from this guide, you will be equipped to tackle any text removal challenge that comes your way.


















































































![How to Add Logo to Photos Online for Free [The Simplest Method] How to Add Logo to Photos Online for Free [The Simplest Method]](https://static.xsbapp.com/market-operations/market/side/1718795949162.jpg)
![How to Remove Tattoos from Photos [Ultimate Guide 2025] How to Remove Tattoos from Photos [Ultimate Guide 2025]](https://static.xsbapp.com/market-operations/market/side/1718787534476.jpg)
